Flashing compute modules
You can flash compute modules using the Turing Pi 1 board. Please follow the steps below to do this:
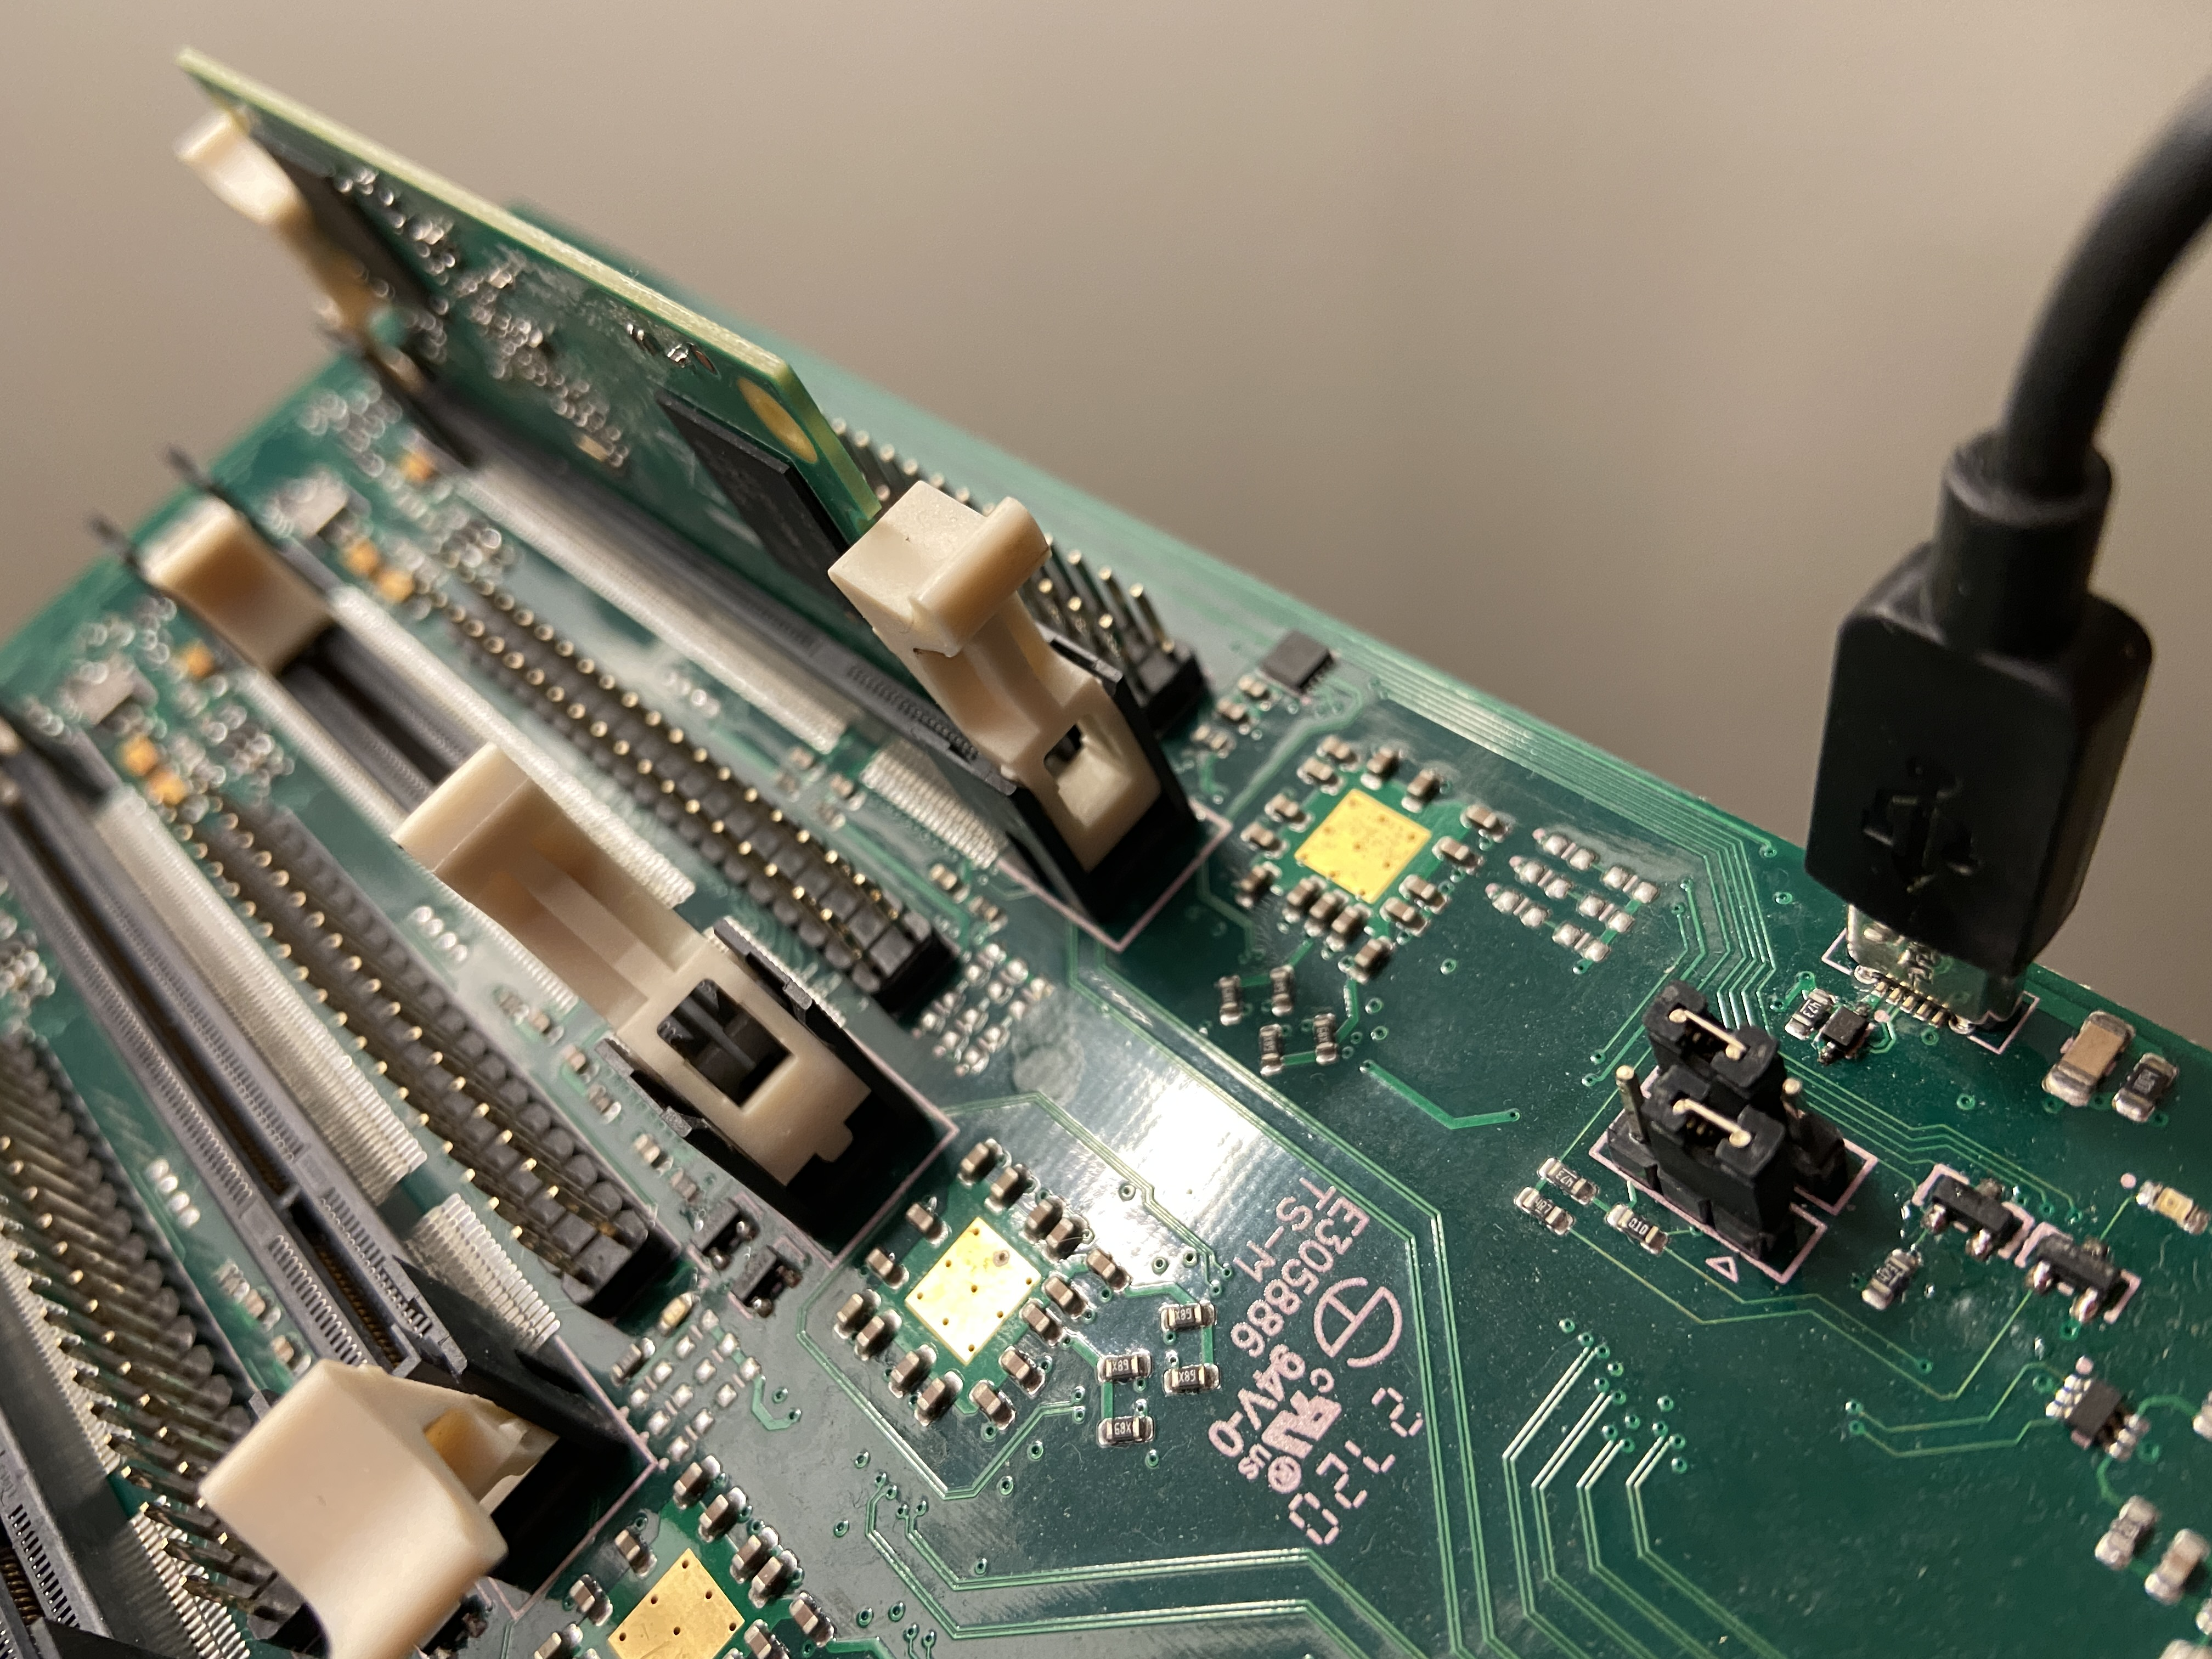
1. flashing node, port, and flash mode
You can flash the compute module using the top/main node on the board. Switch the jumper into the flash mode before flashing and plug your computer into the micro USB flashing port.
2. Install the usbboot tool
usbboot toolTo turn the Raspberry Pi device into a USB Mass Storage Device, you need the usbboot tool developed by the Raspberry Pi foundation.
Before you use usbboot tool, you need to install a libusb dependency. The easiest way to install it is by using Homebrew:
brew install libusb
Now you can install usbboot by cloning it's repository and running make:
# Clone the `usbboot` repository.
git clone --depth=1 https://github.com/raspberrypi/usbboot
cd usbboot
make
If you get a deprecation warning, please ignore it.
Run rpiboot with sudo:
sudo ./rpiboot
Connect the Turing Pi to your computer via a micro USB flashing port, and power on the board. You should see the following:
sudo ./rpiboot
Password:
Waiting for BCM2835/6/7/2711...
Sending bootcode.bin
Successful read 4 bytes
Waiting for BCM2835/6/7/2711...
Second stage boot server
File read: start.elf
Second stage boot server done
If your computer doesn't see the compute module, or you getting errors when trying to write an OS on it, please try other USB cables. Some USB cables may not supply enough power to transfer data onto USB mass storage devices. Also, always plug a USB cable directly into your computer.
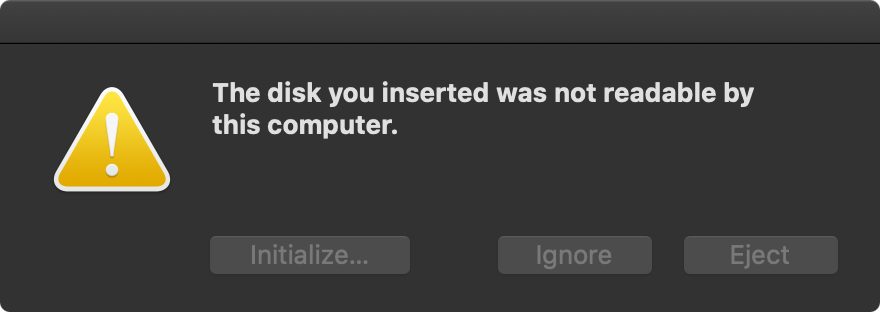
Once that's complete, you may see a message stating "The disk you inserted was not readable by this computer.". Simply click "Ignore".
3. Flash OS
{% hint style="info" %}
We recommend using Hypriot OS and setup each node with SSH enabled Docker container, instead of connecting a keyboard and a mouse to USB ports.
{% endhint %}
- Find out the identifier of the Compute Module:
diskutil list(should be an 'external, physical' ~8/16/32 GB device, like/dev/disk2) - Unmount the disk:
diskutil unmountDisk /dev/disk2(substitute your disk identifier here!) - Write the OS image to the card:
pv ~/Downloads/hypriotos-rpi-v1.12.3.img | sudo dd bs=1m of=/dev/rdisk2
This command uses pv (brew install pv) which makes it easy to monitor the progress. You can use ddinstead.
4. Boot the compute module
After unmounting the volume:
- Unplug the power and micro USB connection
- Switched the jumper back to 'boot' mode
- Power the Turing Pi board
Updated almost 2 years ago